My Process
With these images, I want to show you some typical steps in my process for bringing an image from the beginning drawing to completion.
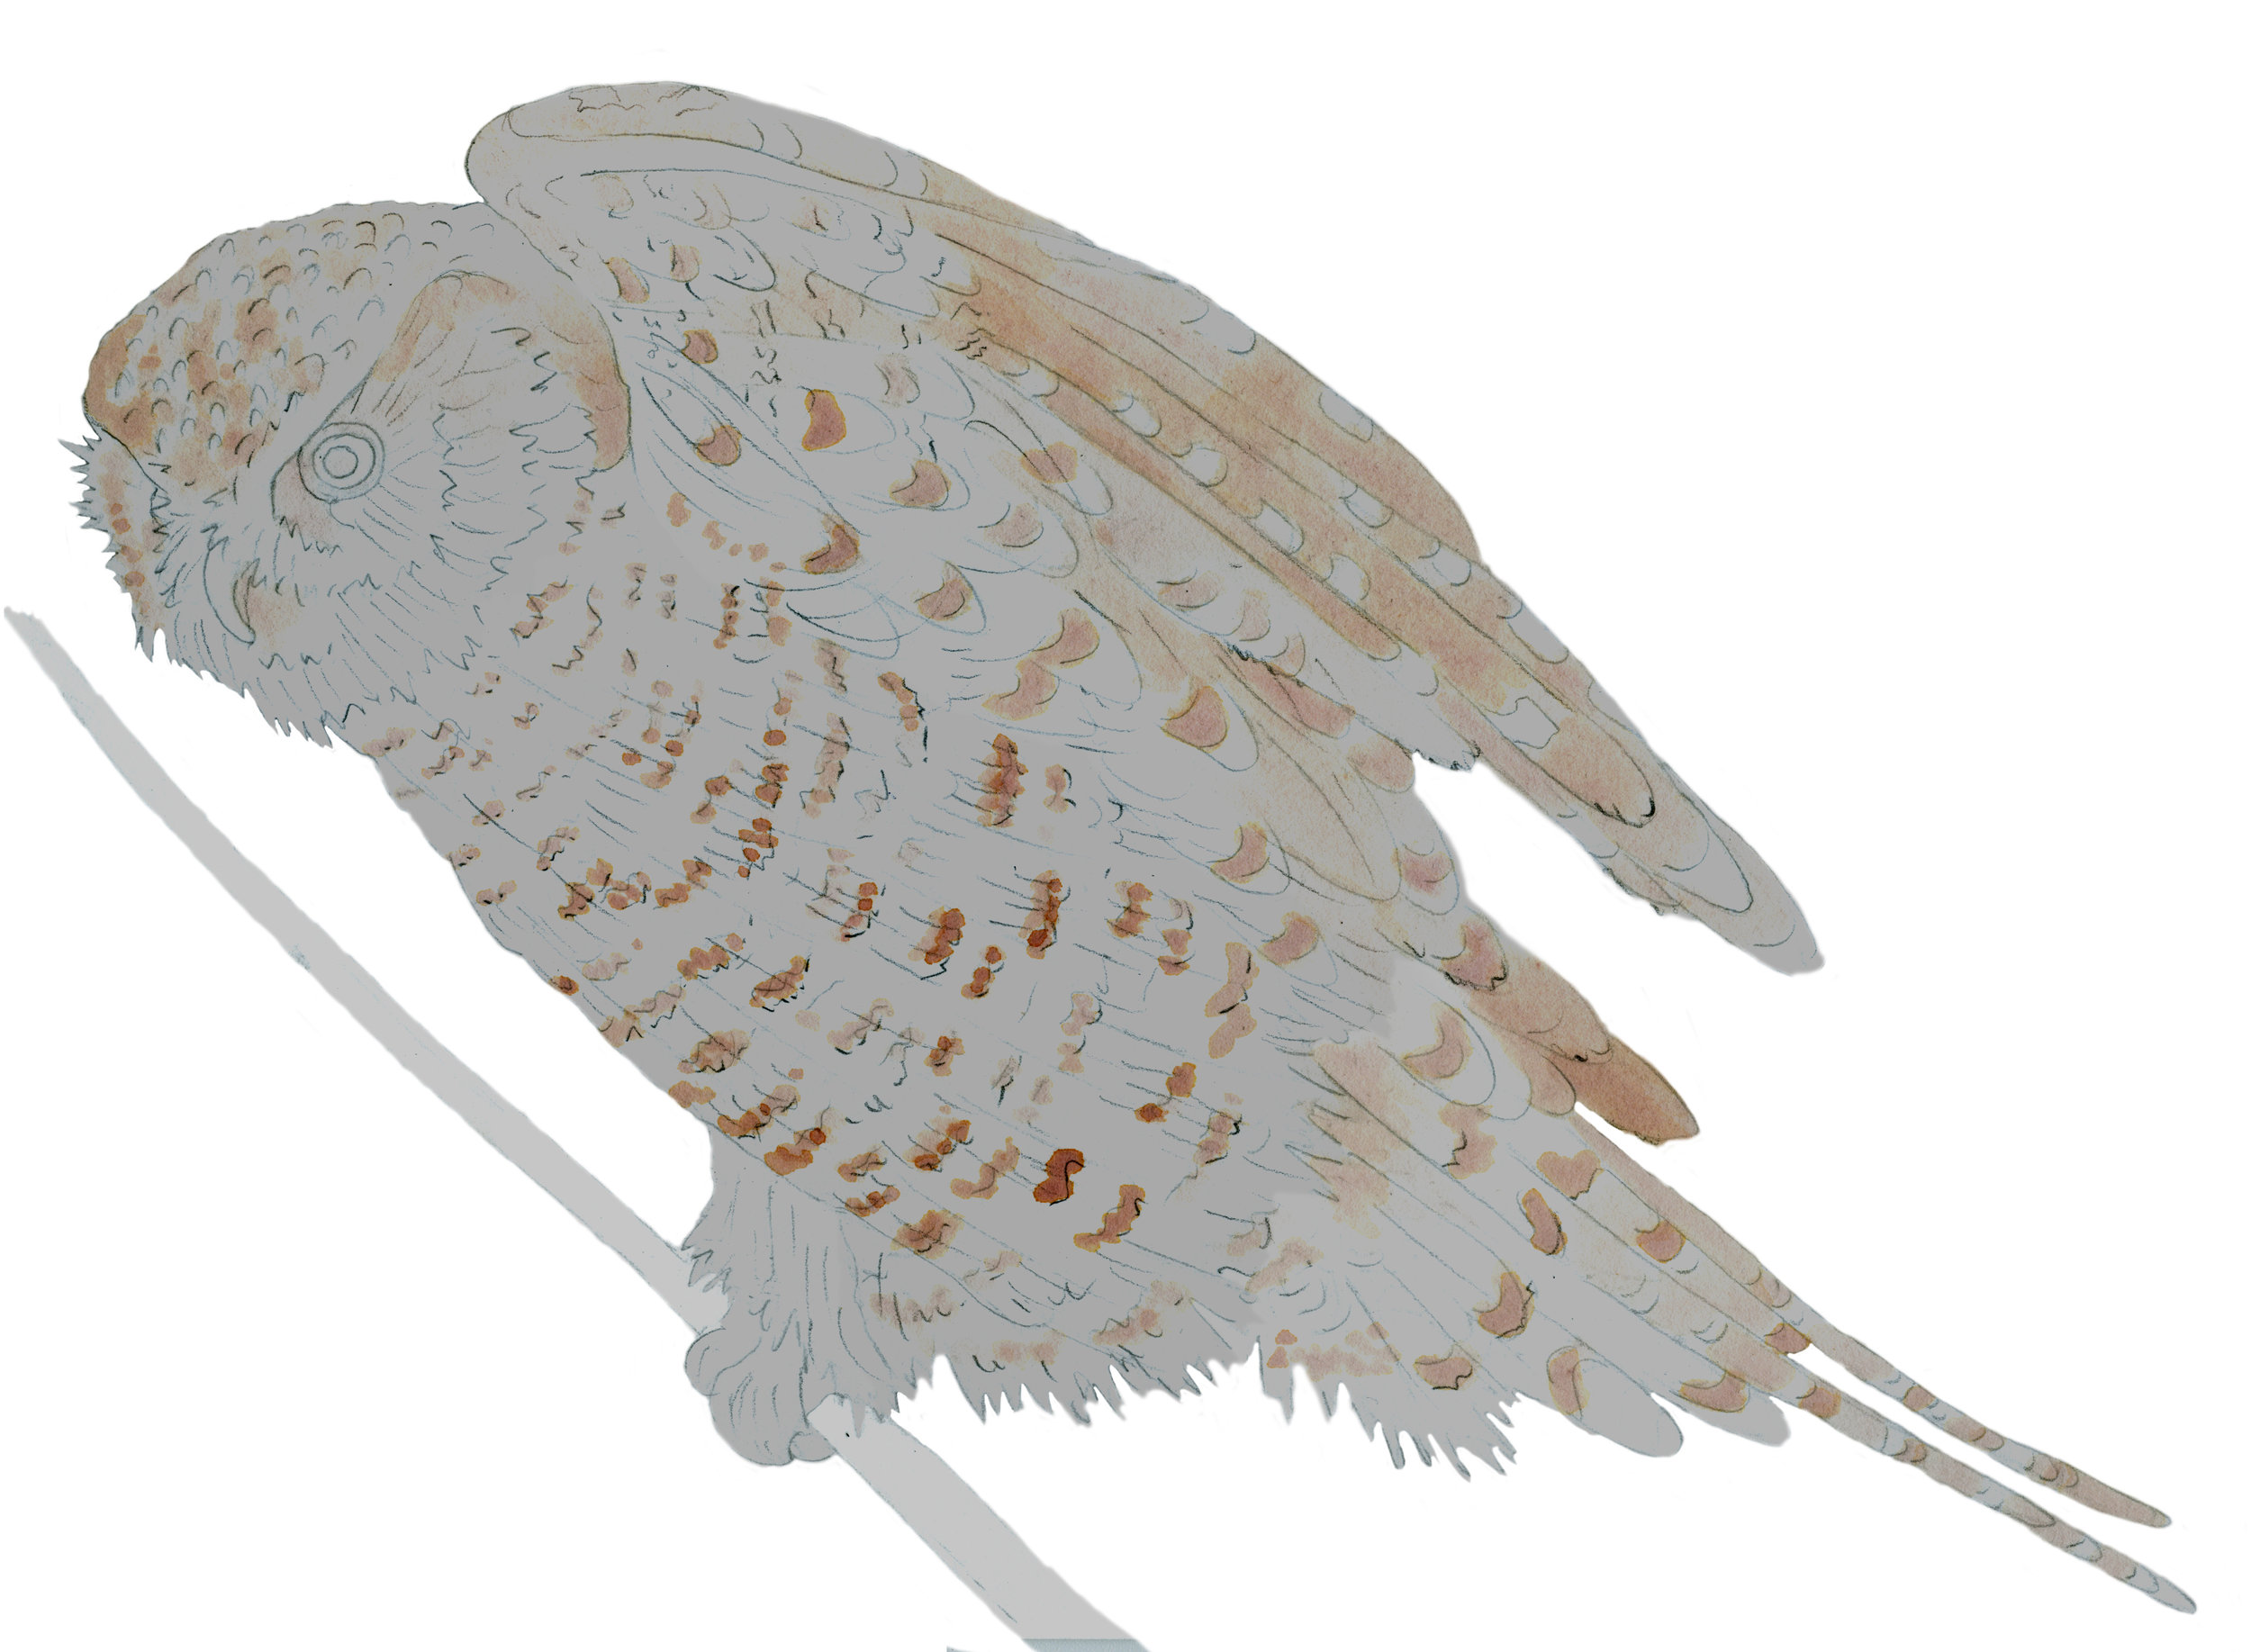
STEP ONE

I began this painting with a pencil and watercolor painting of a hawk owl. I prefer to begin with a drawing/painting on paper because I find the computer is not able to create the texture of a work on paper which I love. I then scanned the painting into the computer, opened it in Photoshop and darkened it. I find that a medium darkness is the best starting point from which I can go up for the lights and down for the darks
STEP TWO
My next step is always to erase around the image. Some people may find this to be tedious but to me it is absolutely worthwhile because I am able to work only on the image and later bring in a background that works with the composition and the content of the primary image.
STEP THREE
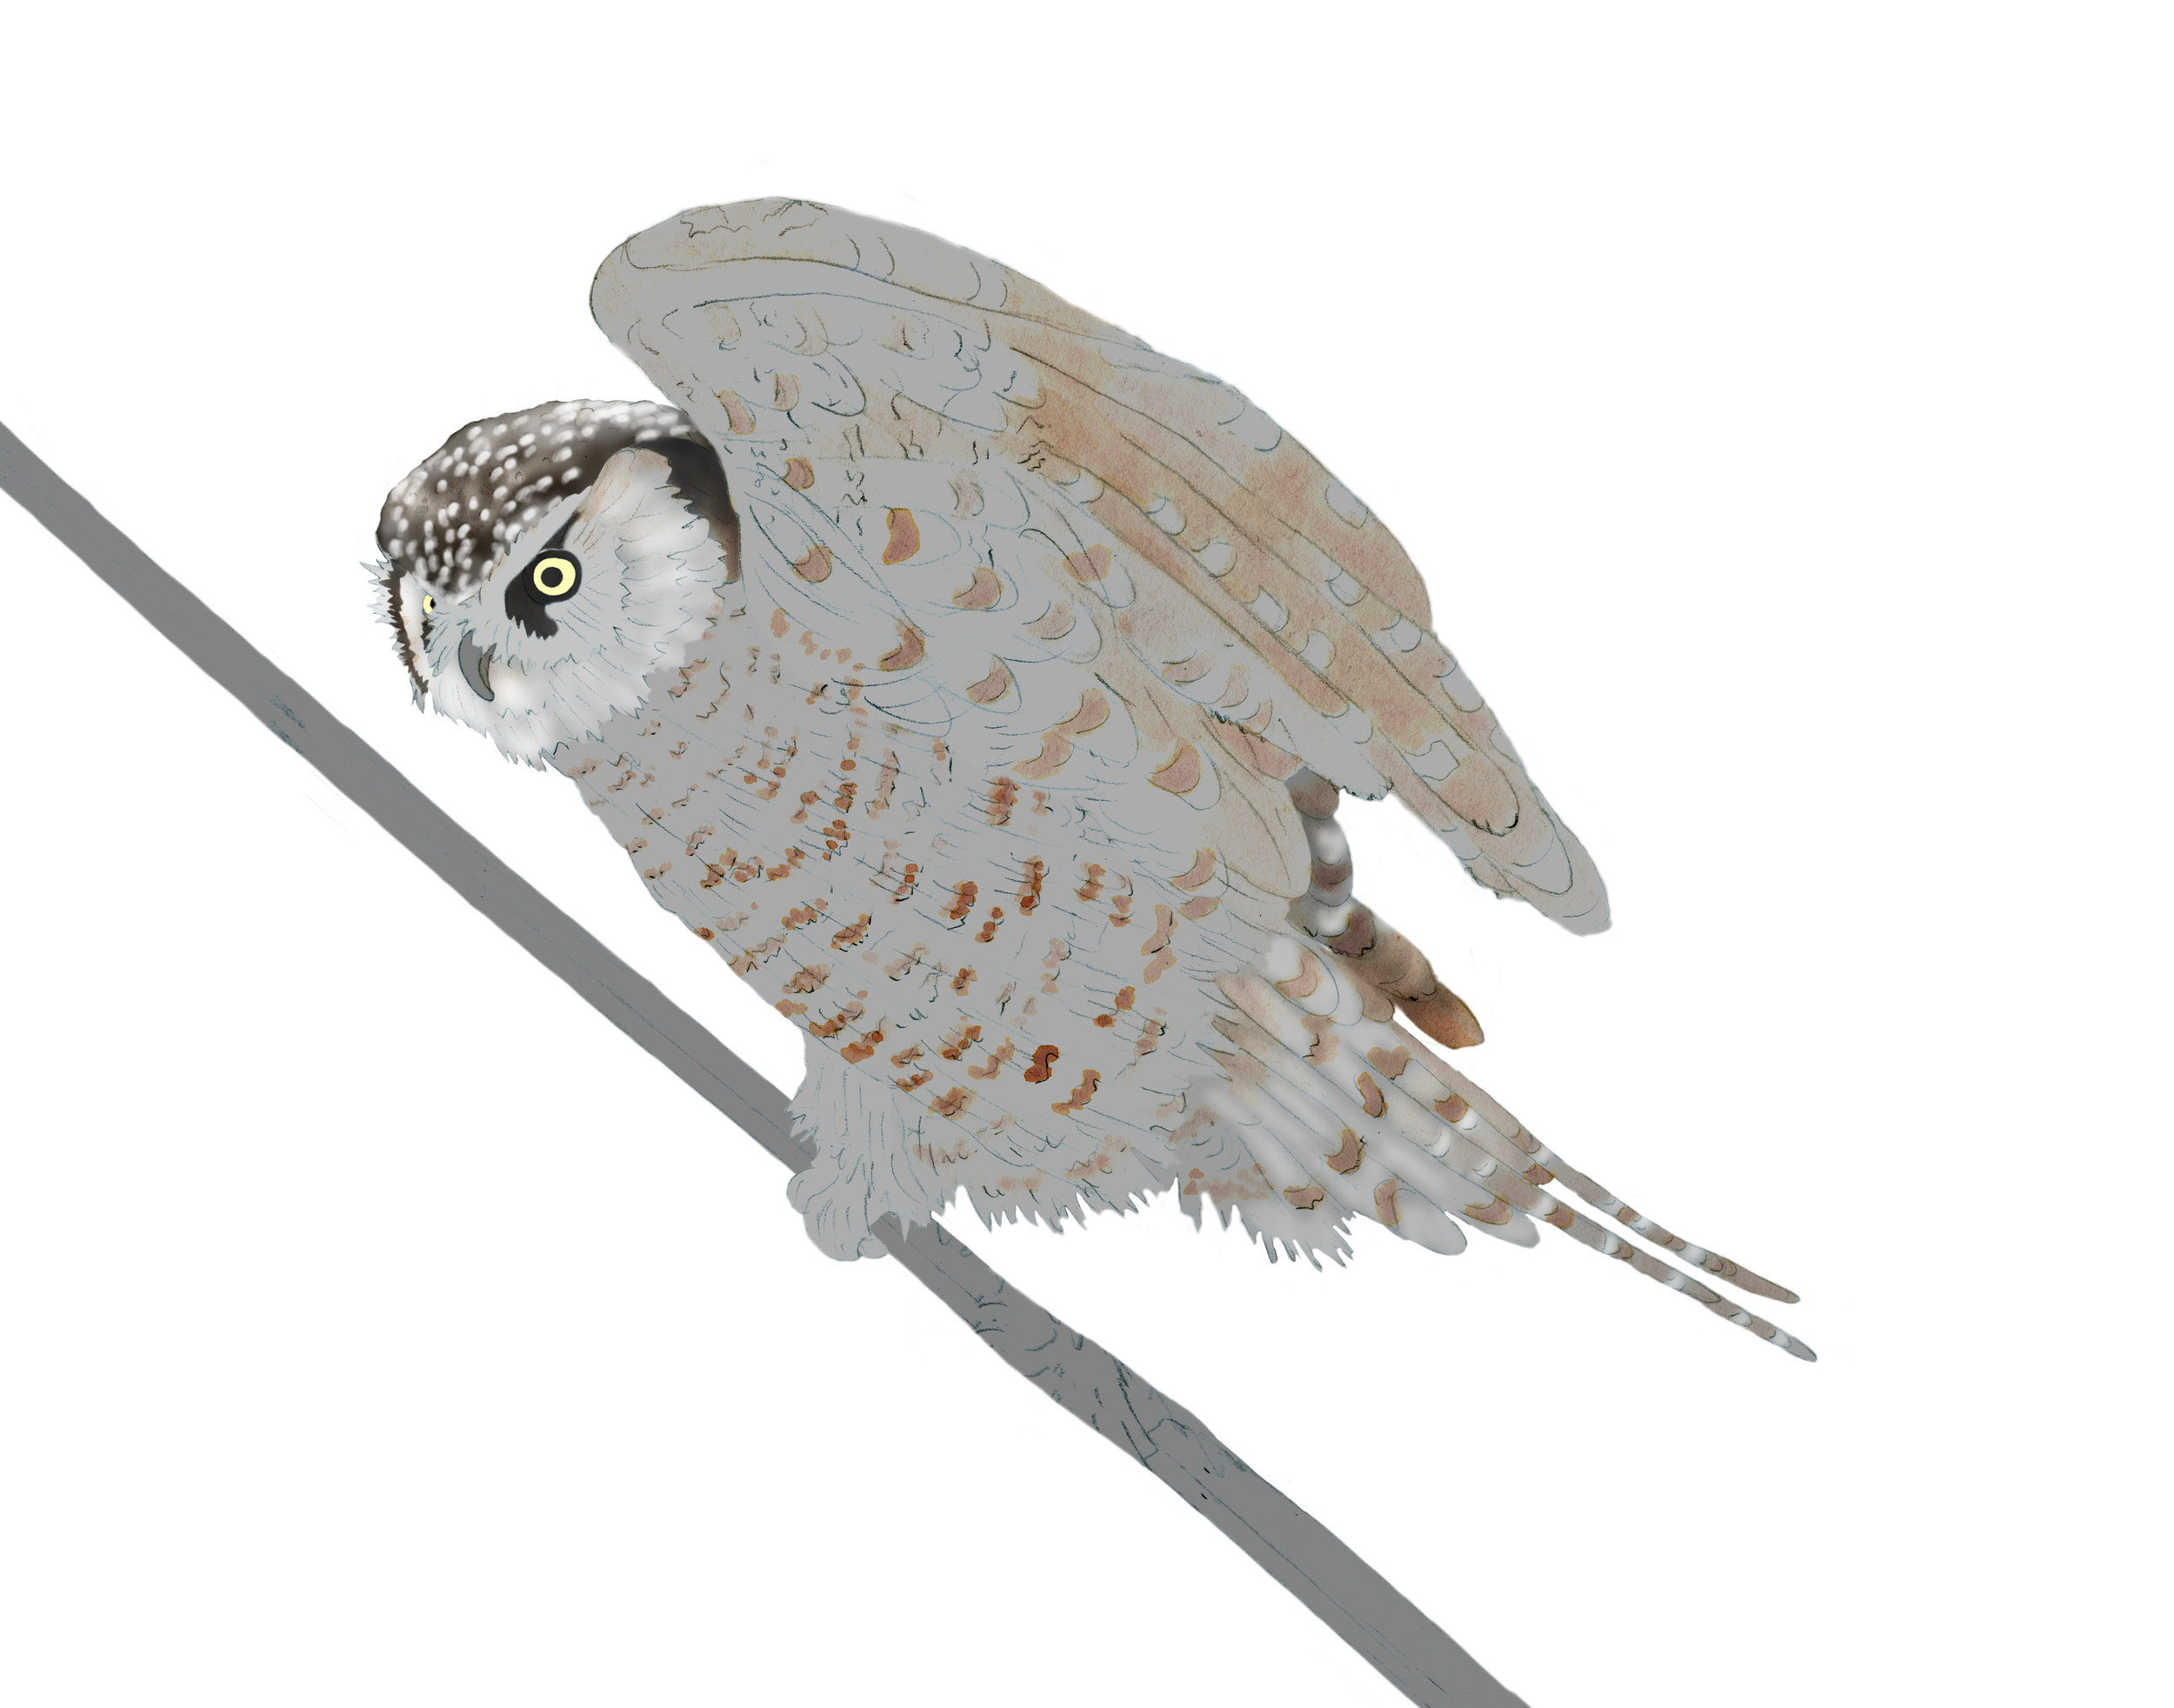
I began the editing in Photoshop with copying each part onto a new layer, e.g., the eye, the beak, the head, the chest, the front wing, the back wing, the tail, the feet, the branch. This could also be seen as a tedious undertaking, because it requires more erasing for each layer, but it is preparatory work to being able to edit each part separately without affecting the remainder of the image. After this, I began working on the head, darkening and lightening areas to bring the image to life. At this point, I had 17 layers in Photoshop.
STEP FOUR
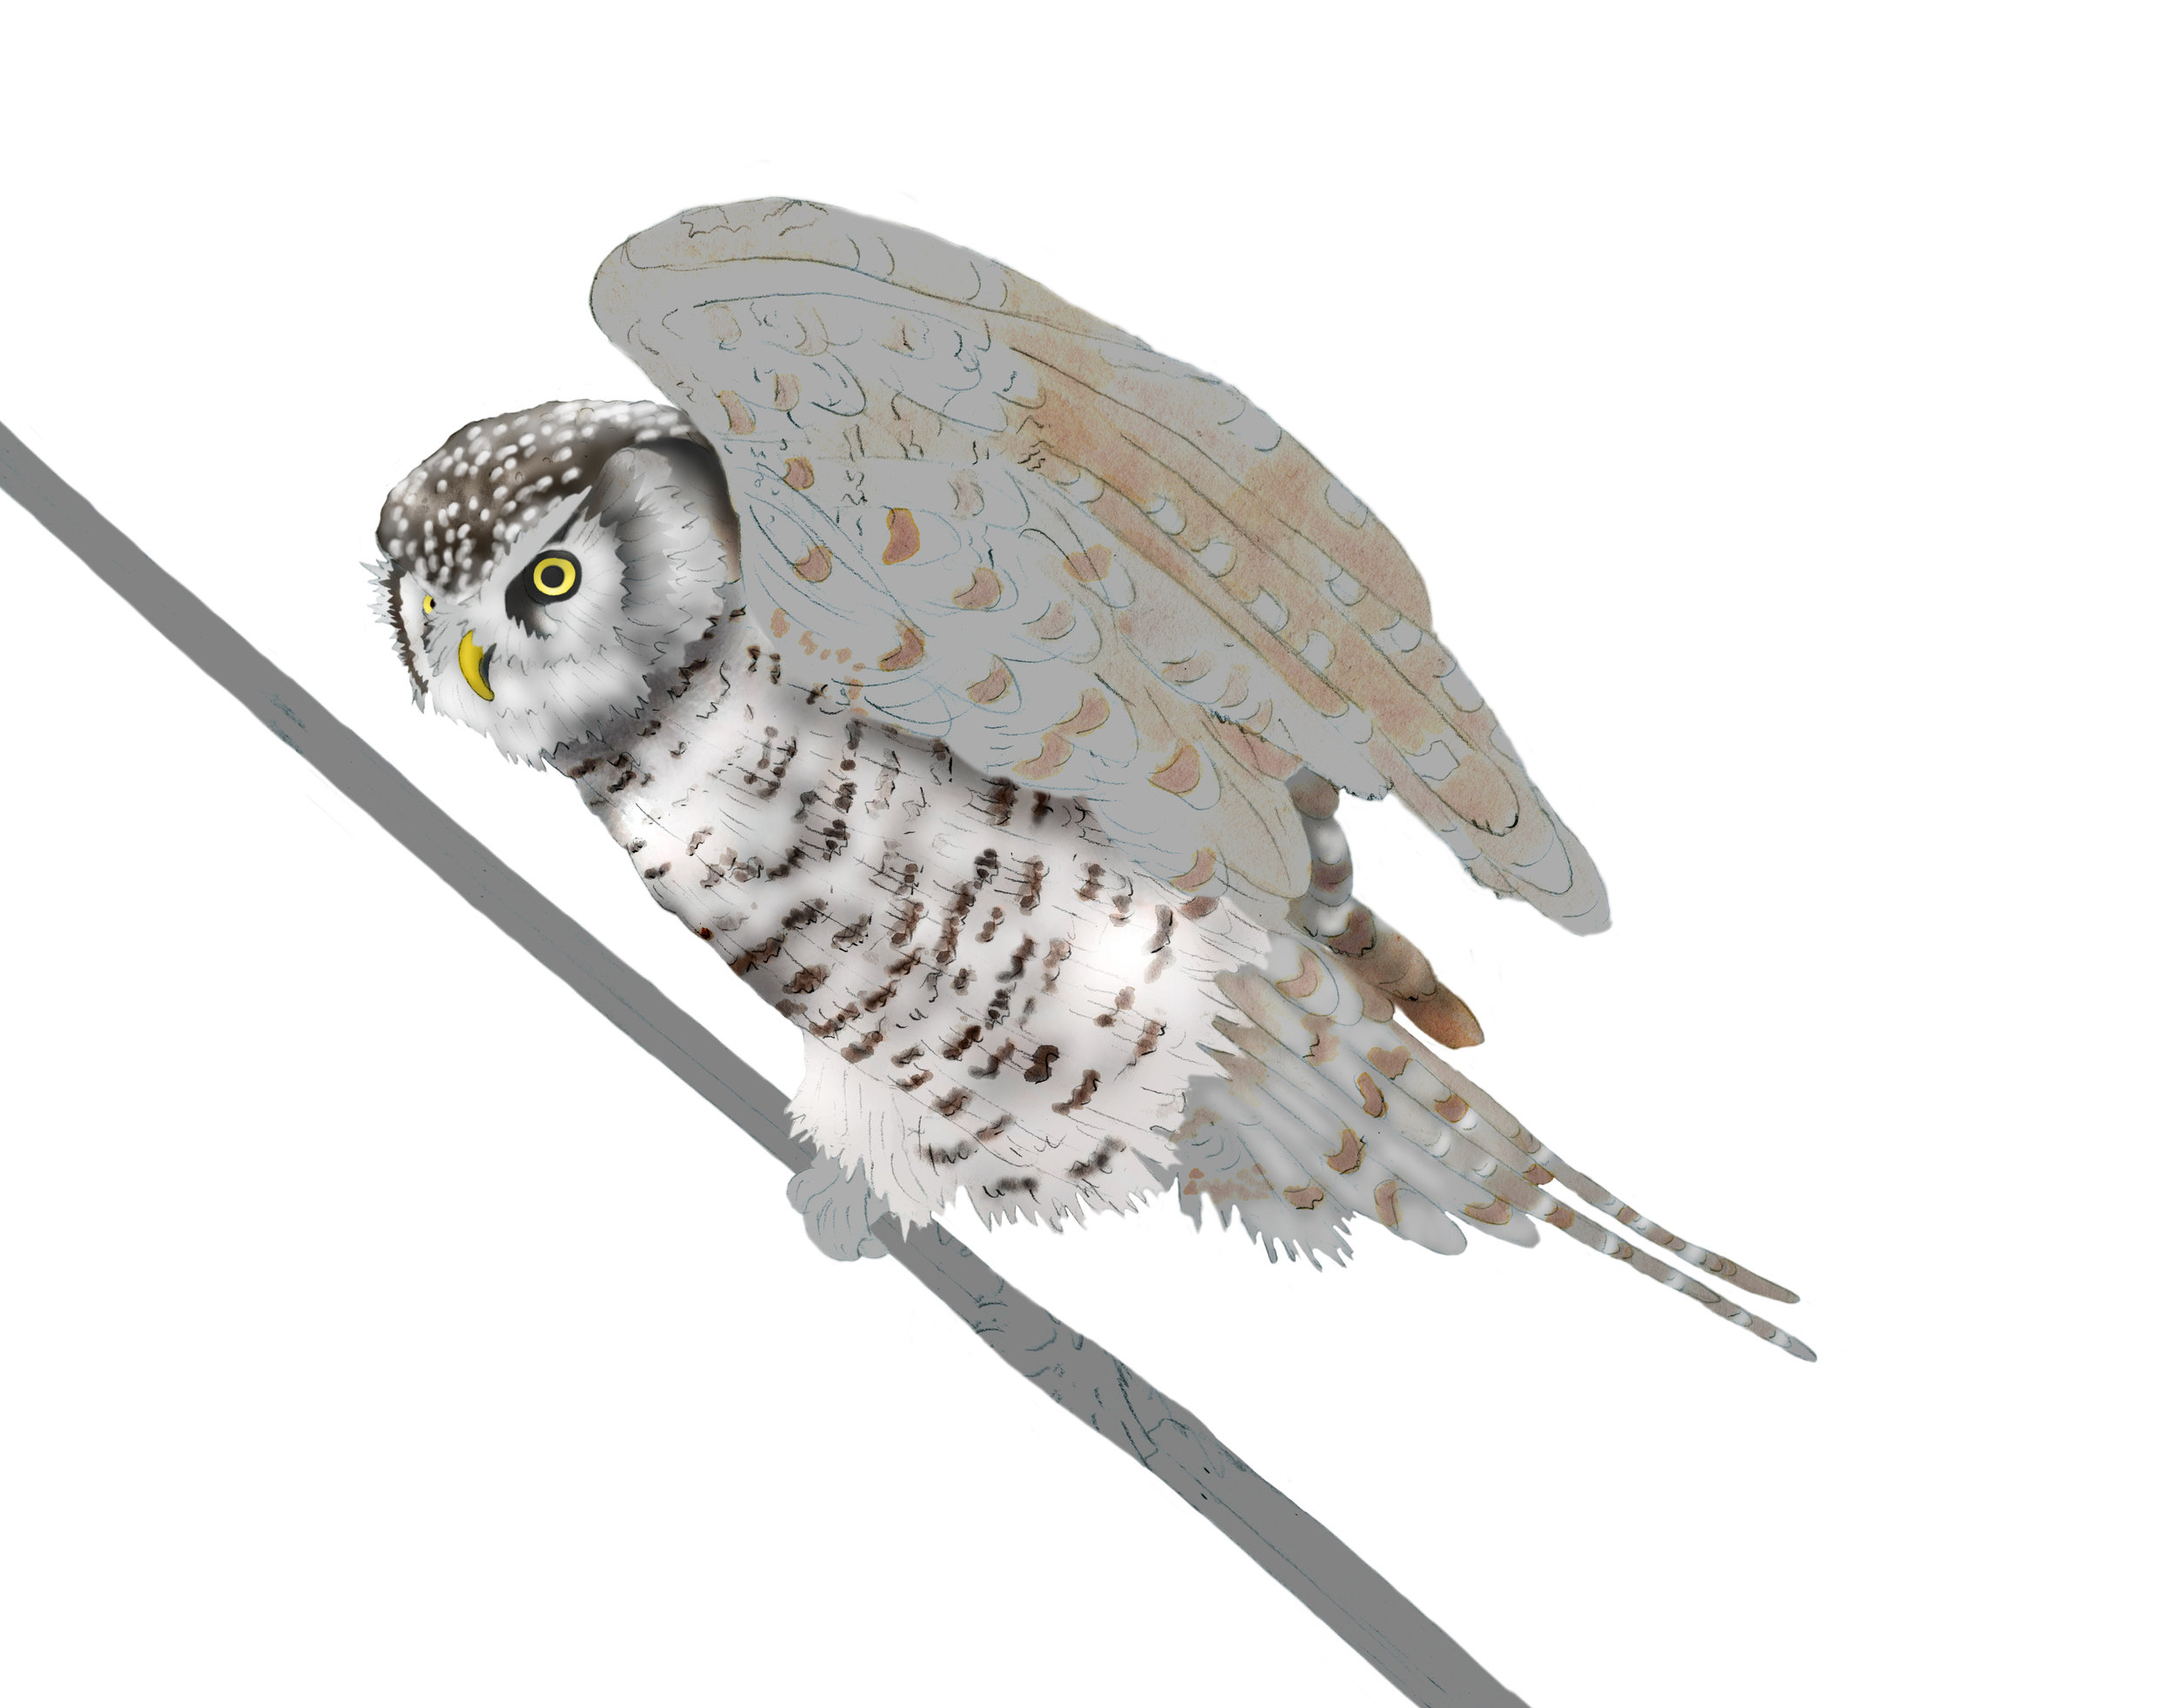
I continued working on the head and began work on the chest – darkening and lightening to create the complicated feather pattern, and beginning work on the tail. The way I work takes many hours, but fortunately I am a patient person and find the final product worth the time.
STEP FIVE
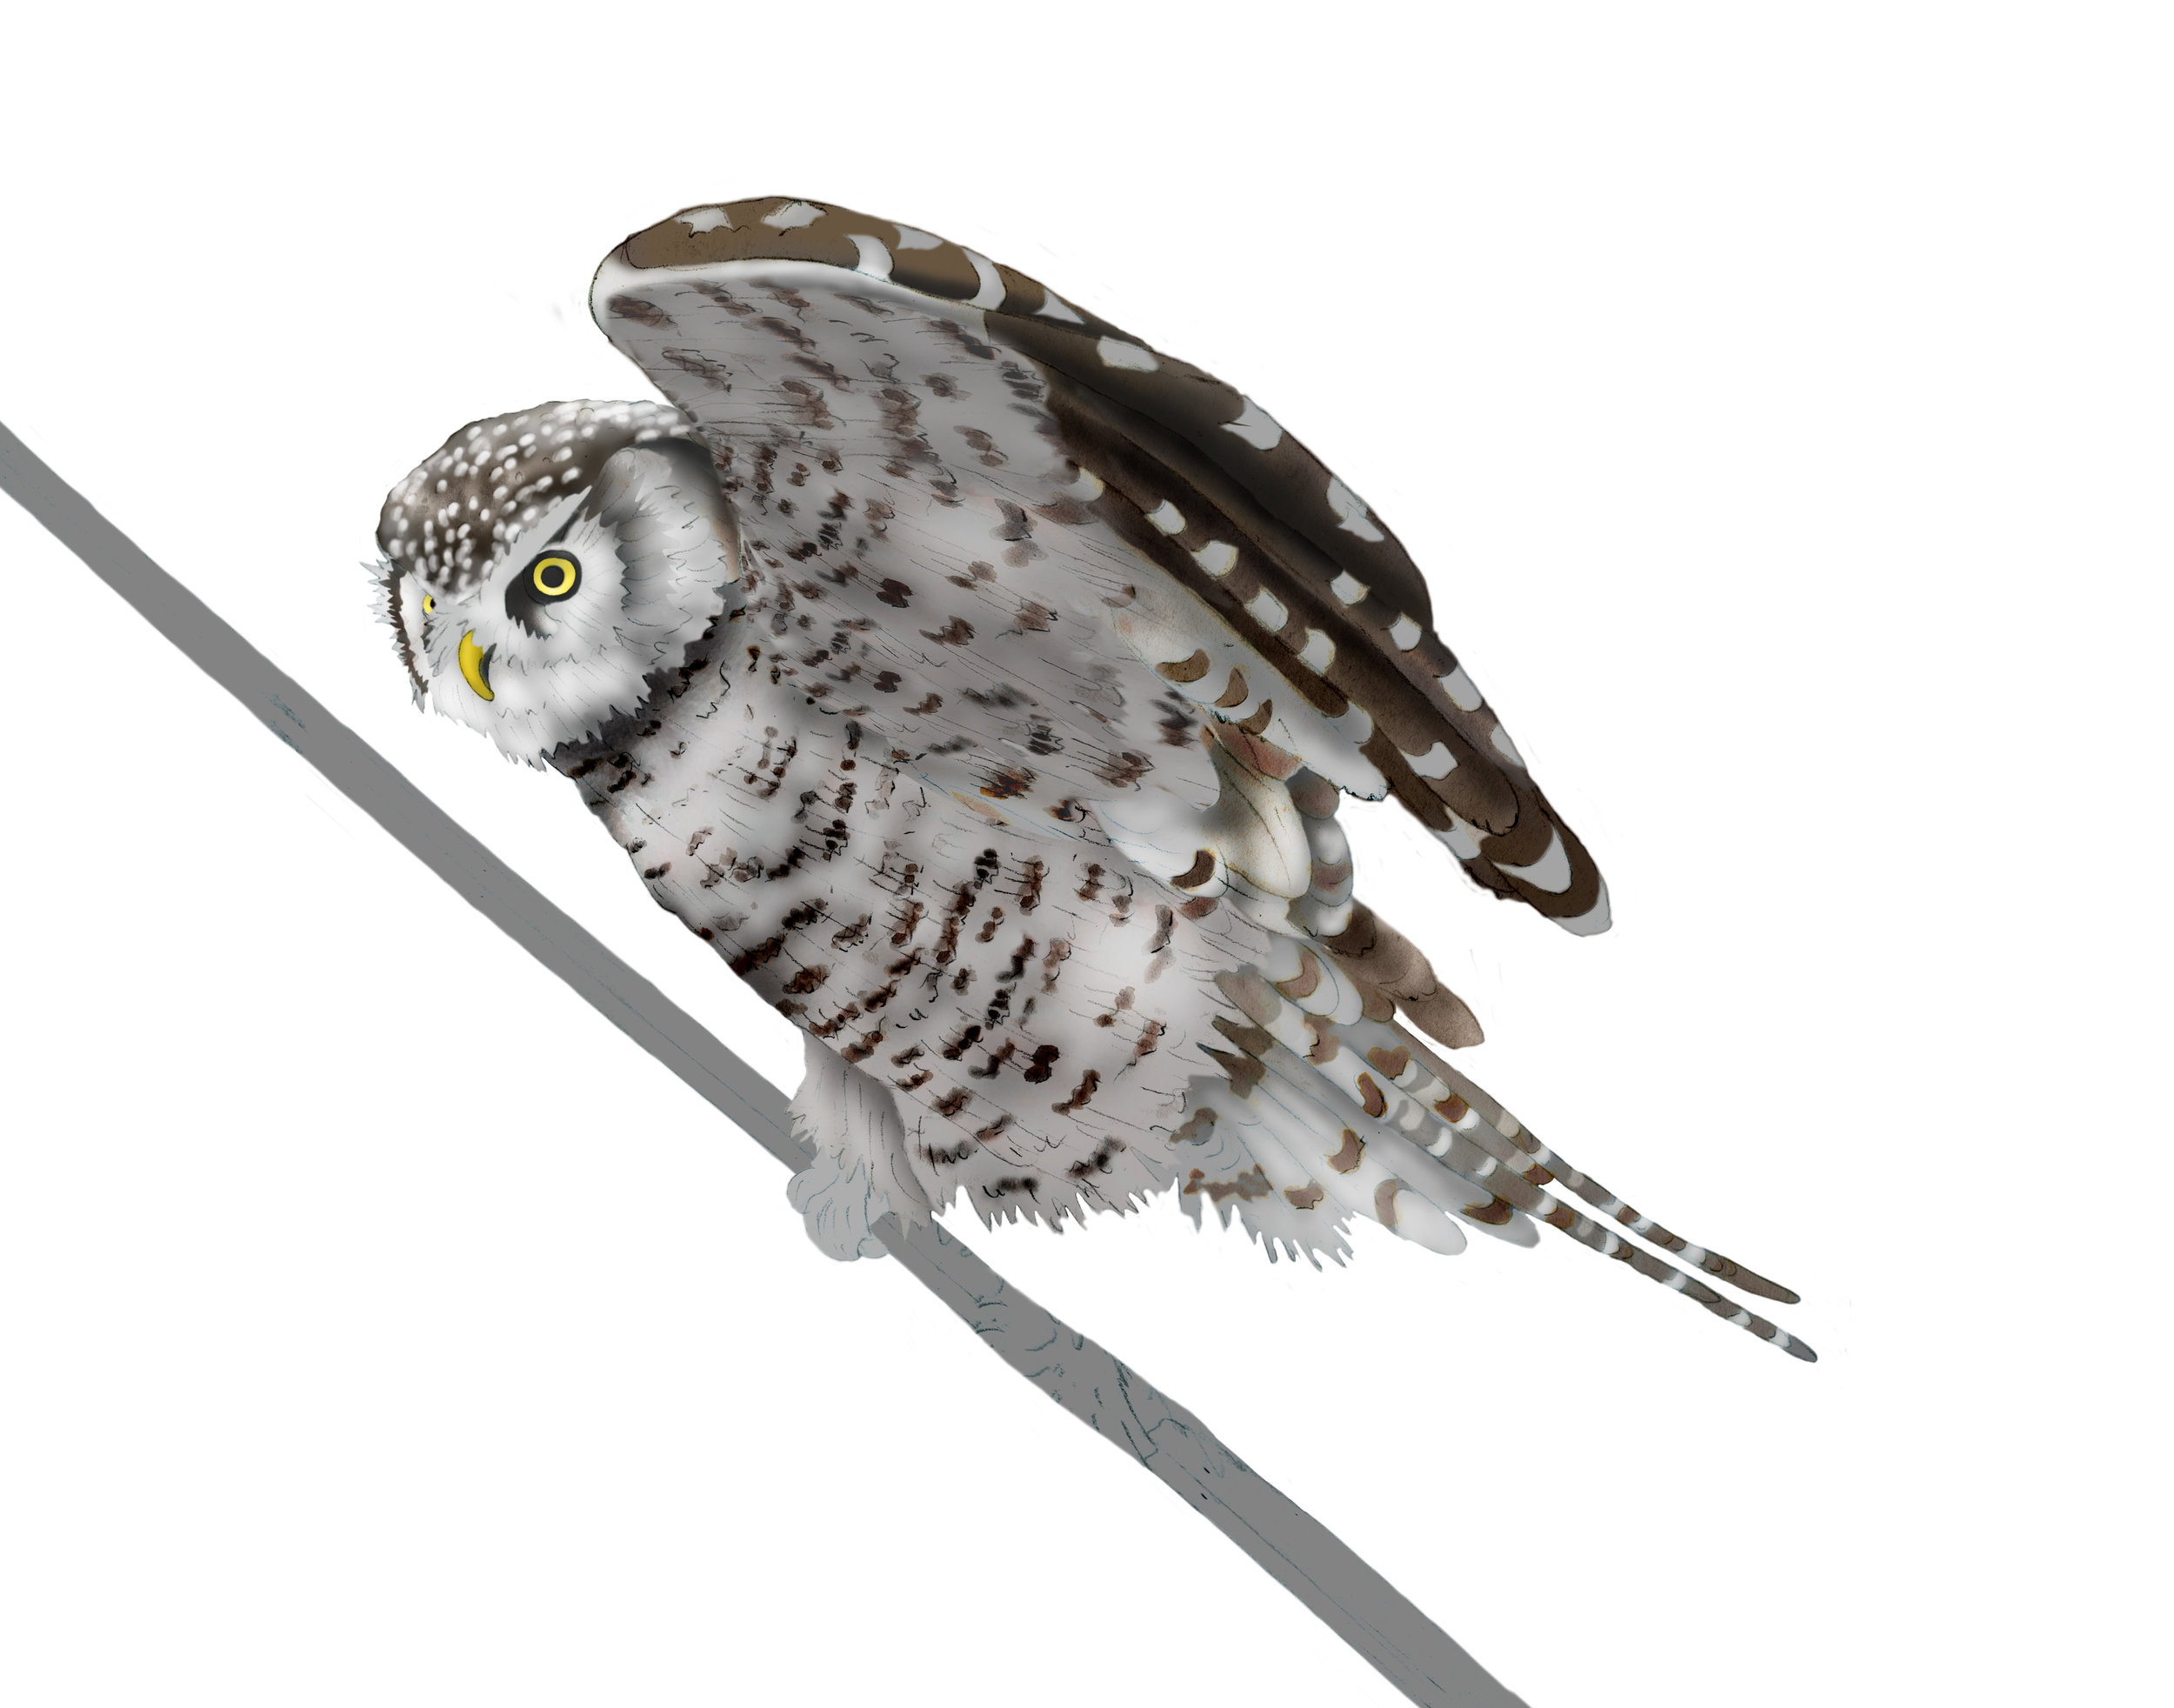
By the time I got this far with the image I had 45 layers in Photoshop, divided into a number of groups so that the layers can be collapsed into groups in order to keep track of the layers. The work on the large front wing was very complicated, creating the feather pattern and darkening and lightening large areas to show the highlights and shadows that give the image its three-dimensional quality. I also continued to work on the tail.
STEP SIX
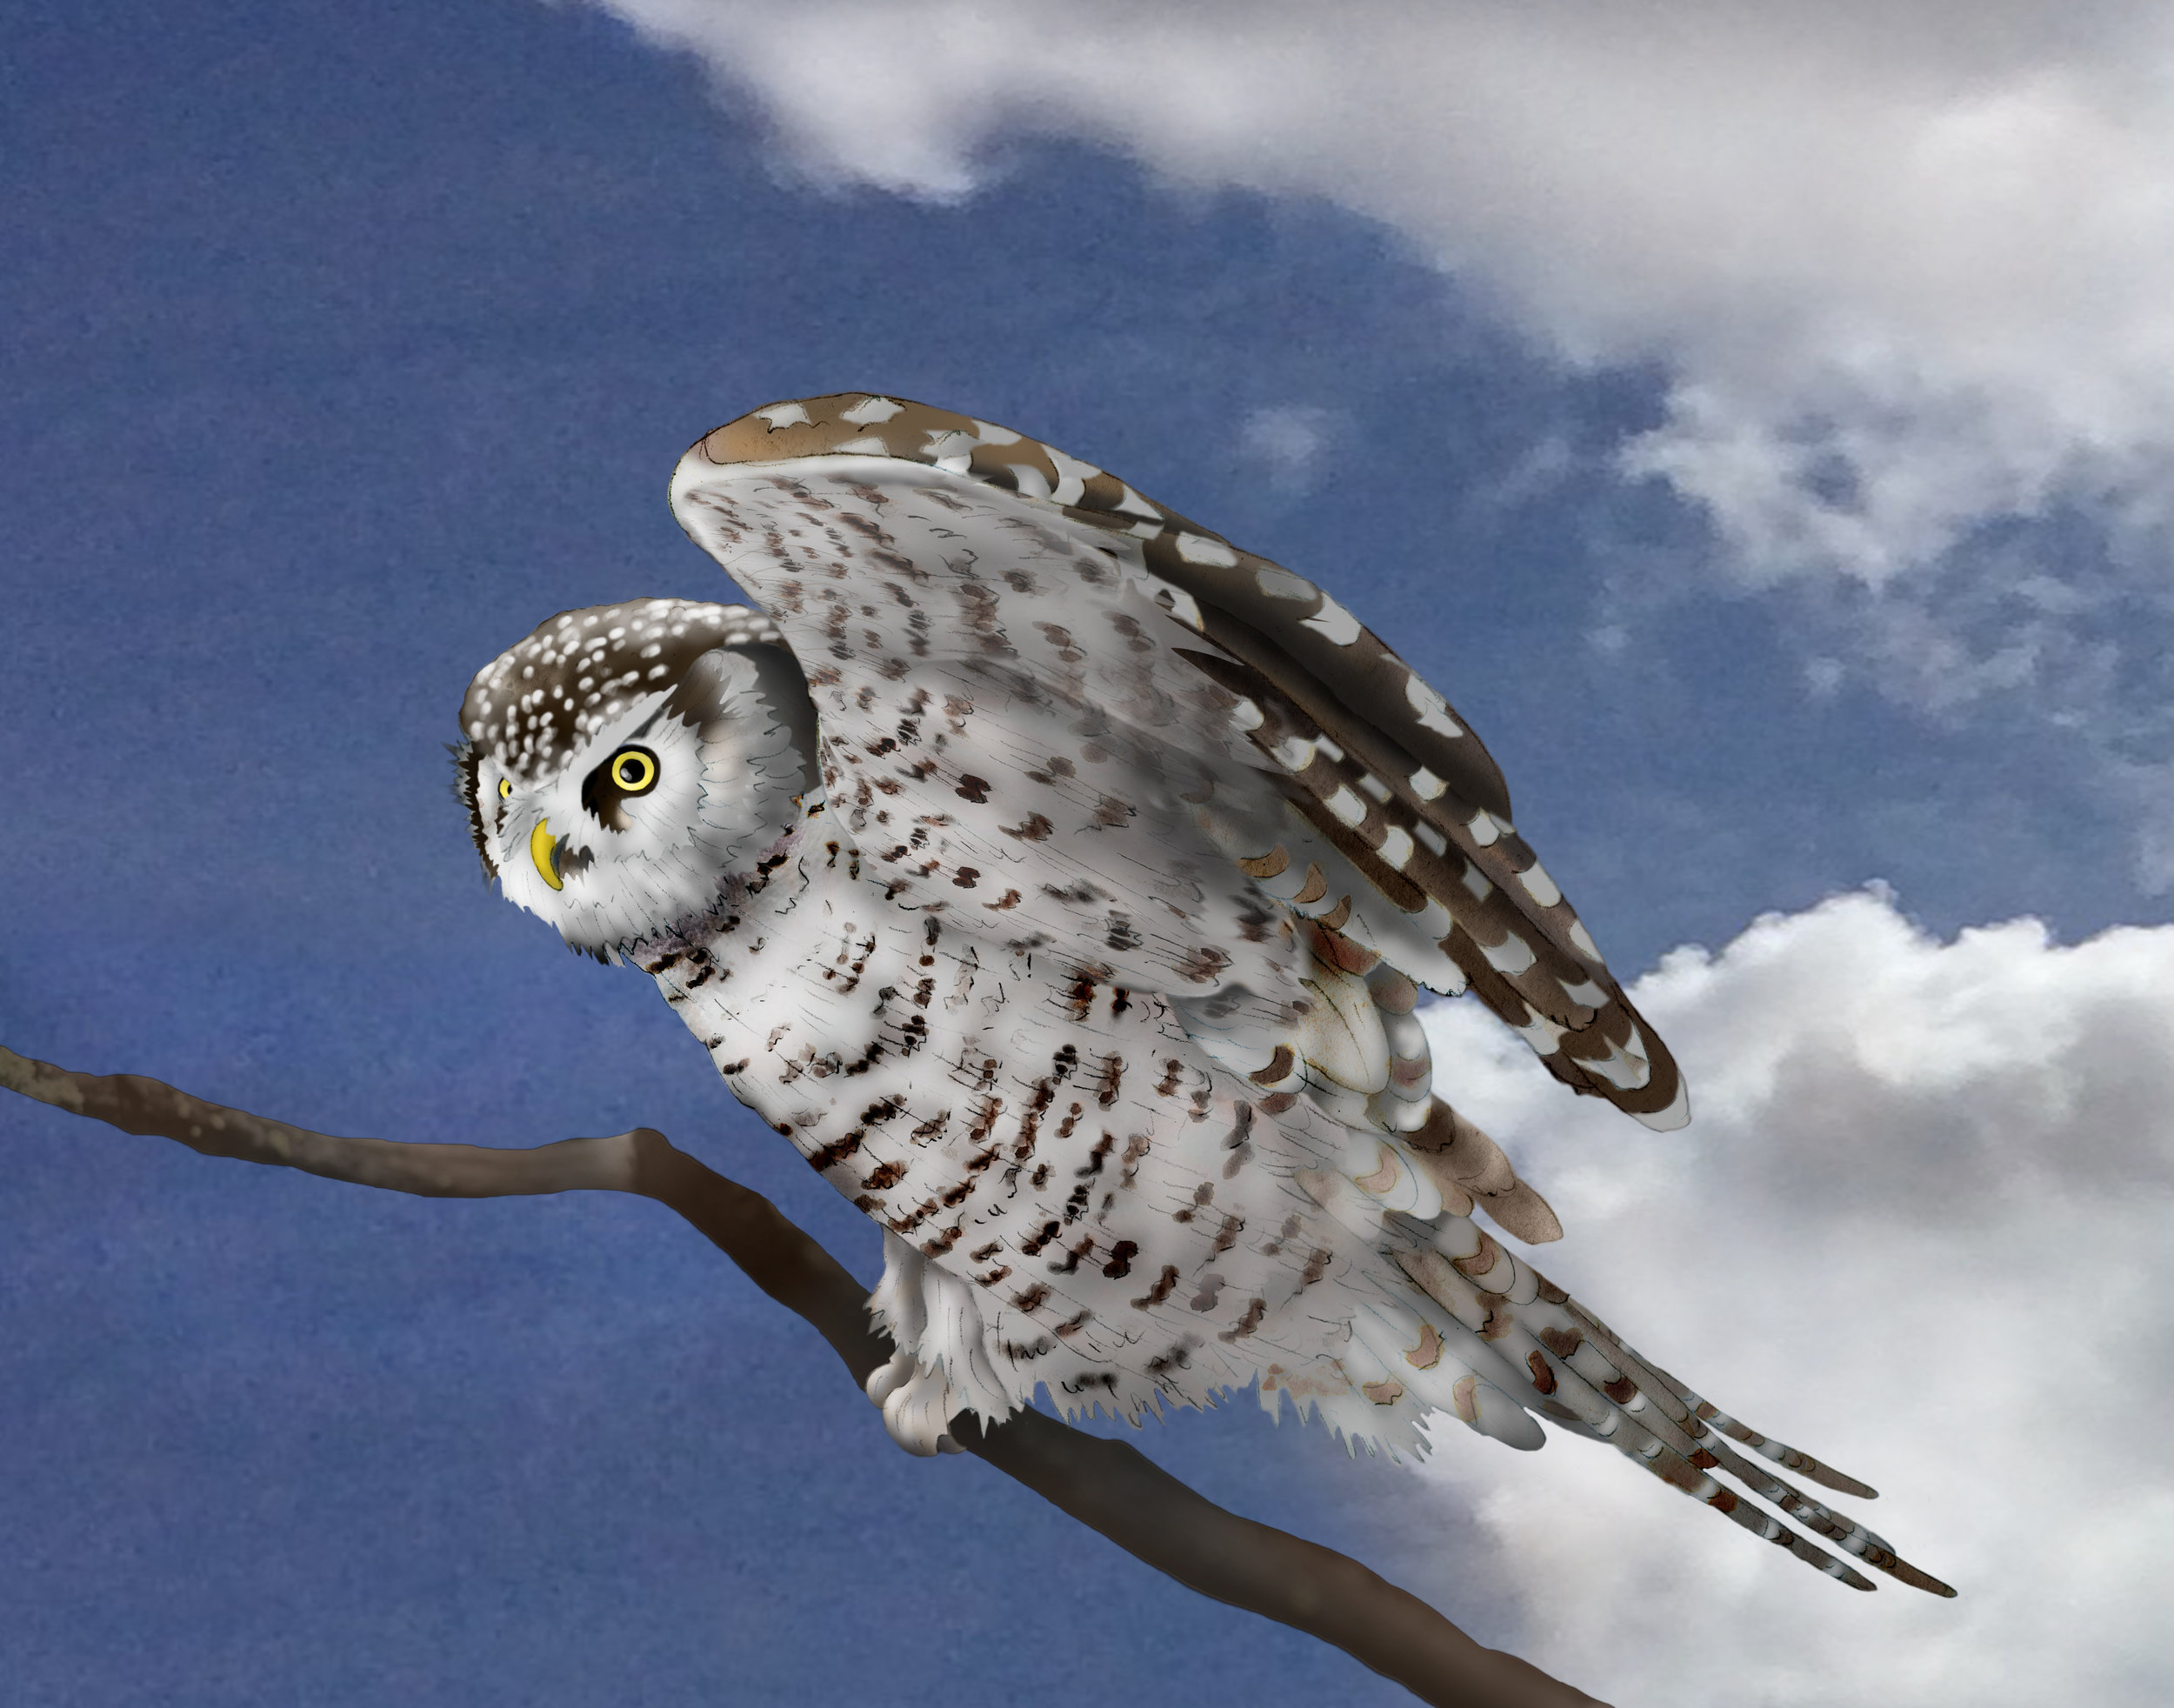
At this point I was happy with the owl image and begin work on the background. Here I brought in a sky and cloud photo to see if that was a direction I wanted to go with the background. I found the blue sky to be too intense a color and not the concept I wanted for the painting.
STEP SEVEN
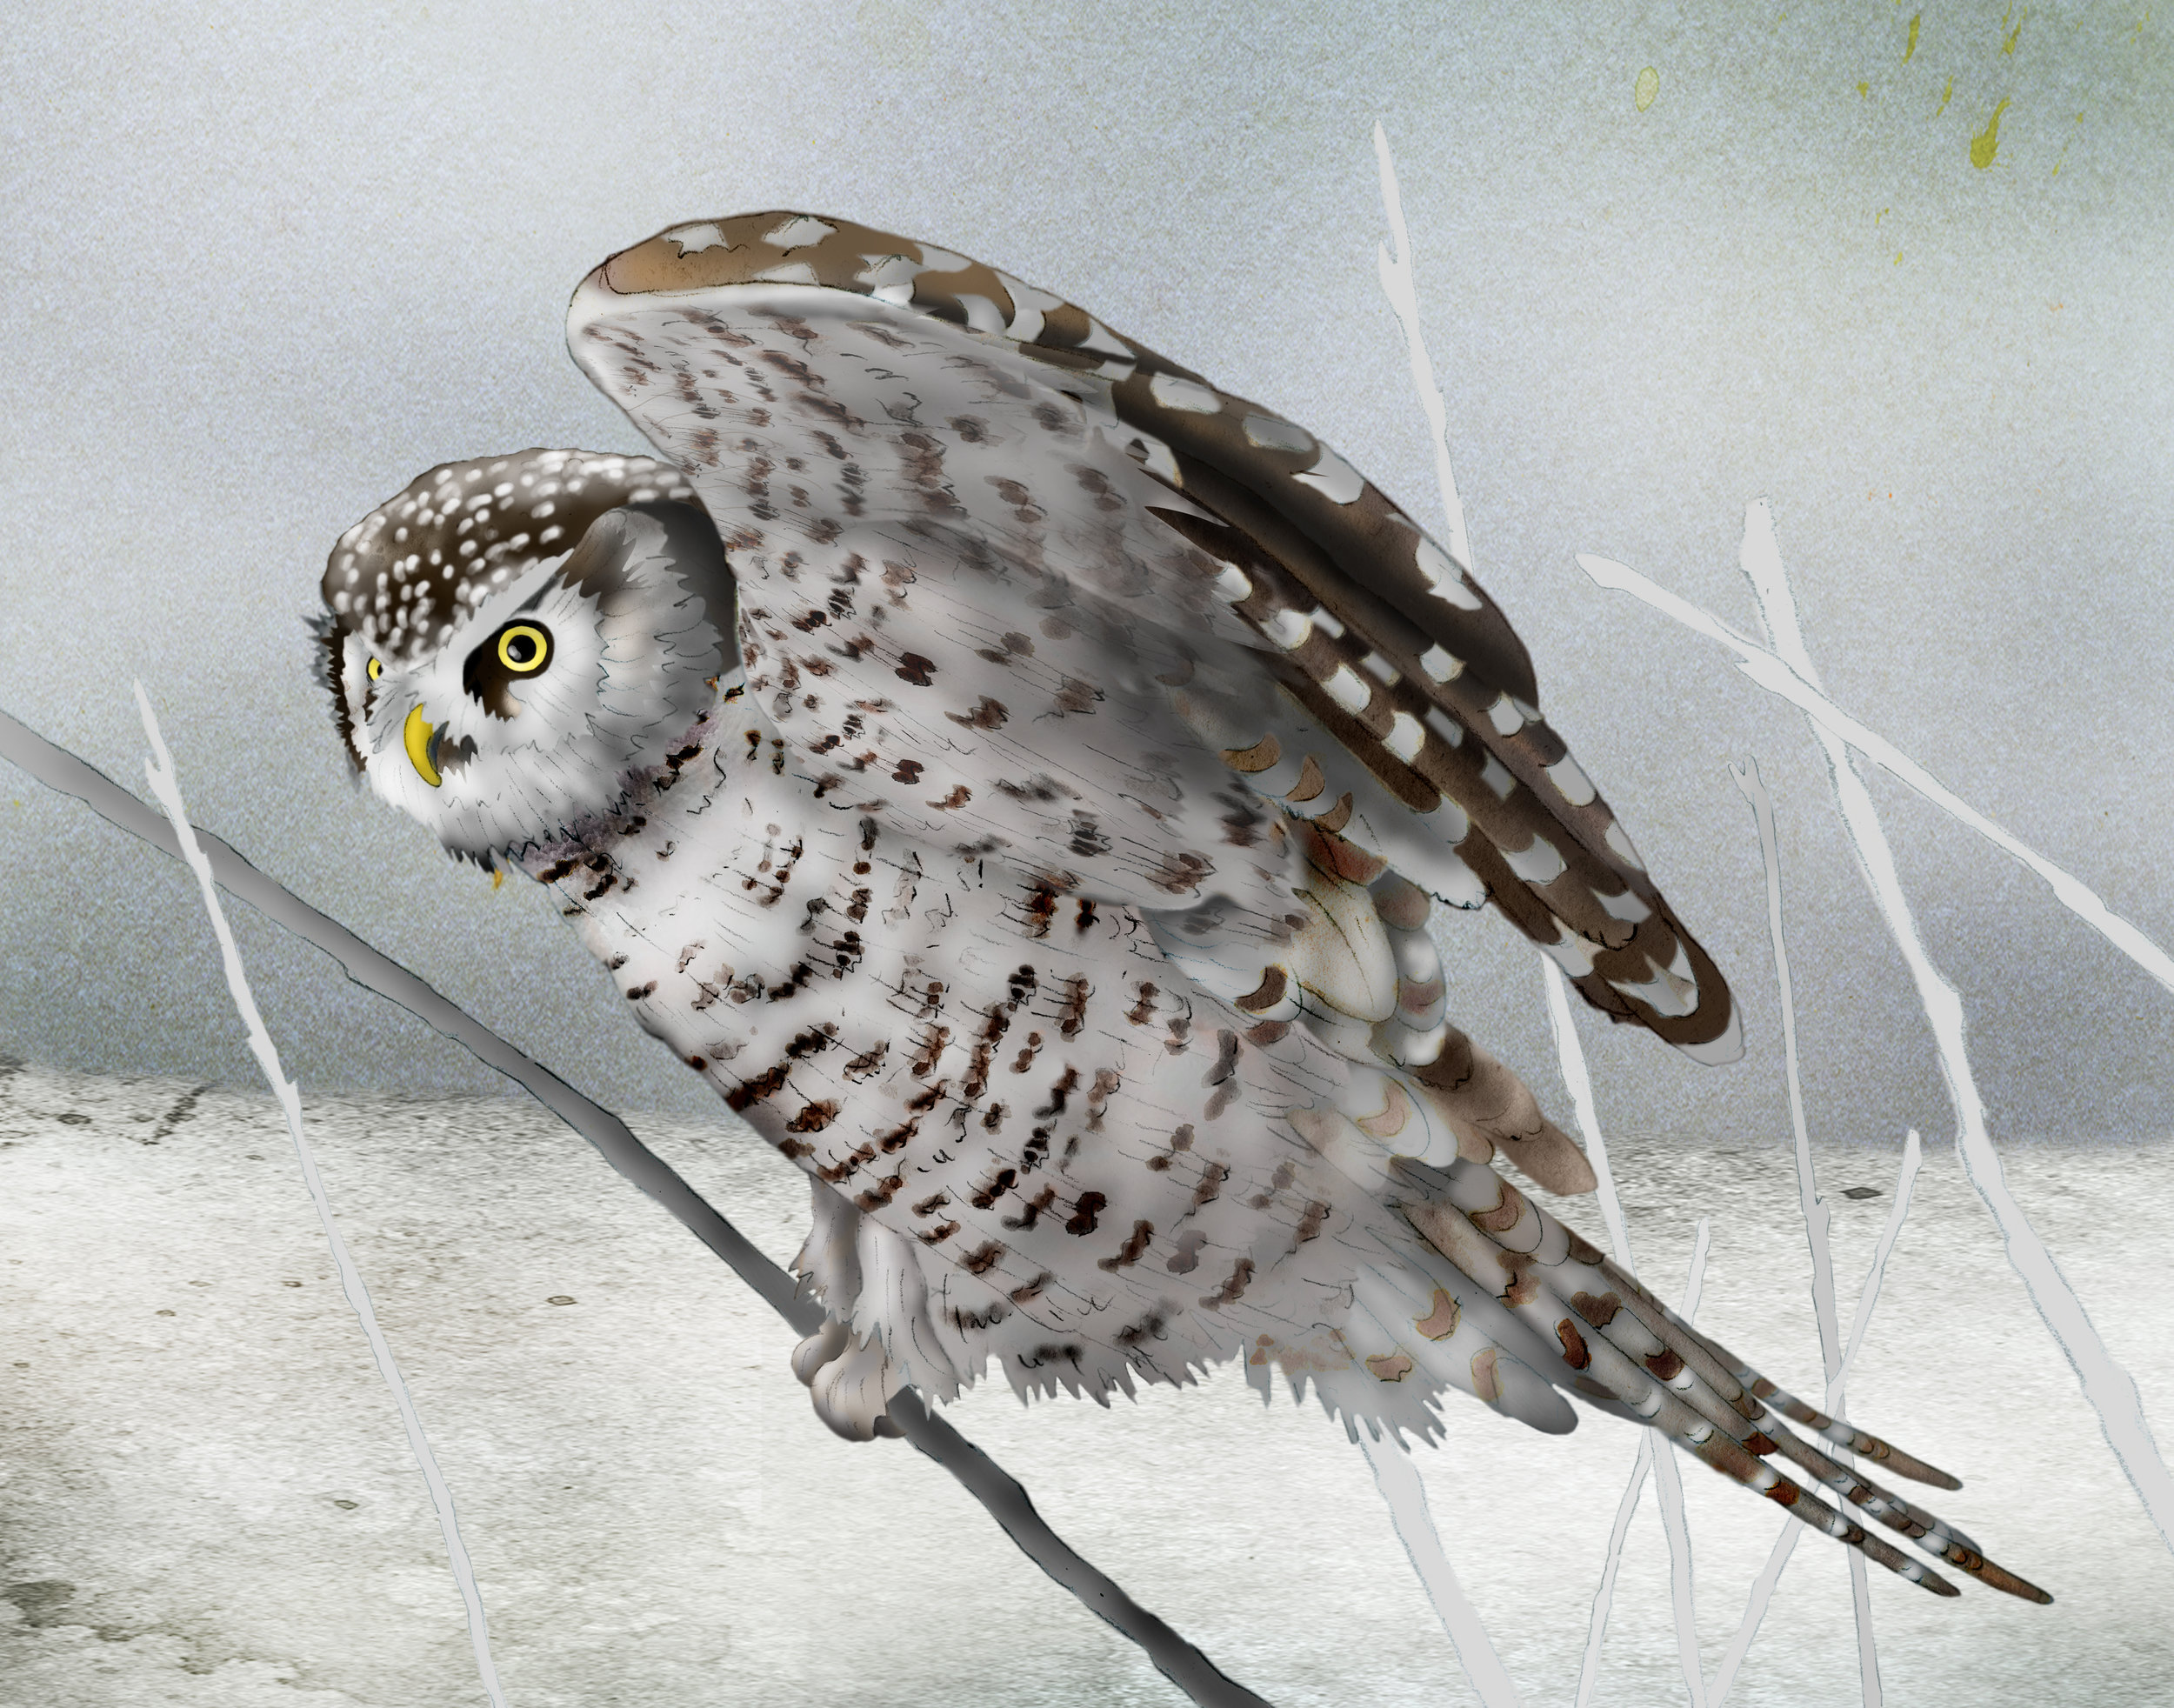
Since the hawk owl is a northern owl, I decided to try a snowy background. I brought in a snowy ground and a subtle green/blue beyond that. These parts of the background came from drawings and paintings I had previously made. I created a more interesting branch and experimented with other secondary branches. I also finished the work on the leg feathers and feet.
STEP EIGHT

I decided the secondary branches to be distracting to the composition of the whole. I brought in some grass in the foreground, and increased the depth of the background by creating a horizon line.
STEP NINE

I lowered the horizon line because I didn’t like it lining up with the line in the large wing and changed the branch to make a more interesting composition with the shape of the owl. I also darkened the background, and then felt satisfied with the image.